Why You’ll Love this Pumpkin Squares Recipe
If you’re looking for a dessert that perfectly captures the essence of fall, you’ll adore this Pumpkin Squares recipe.
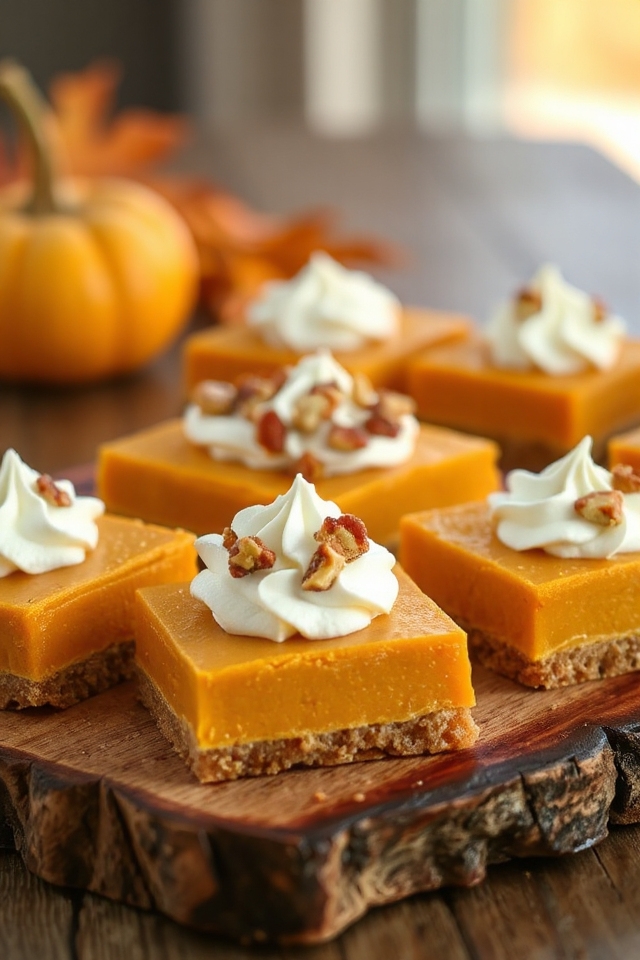
I love how it combines creamy pumpkin filling with a buttery graham cracker crust. Each bite is a delightful blend of spices that warms your soul.
Plus, it’s surprisingly easy to make, which means I can whip it up even on busy days. The Cool Whip topping adds a lightness that balances the richness of the pumpkin.
Whenever I serve these squares, they disappear quickly, leaving everyone craving more. Trust me; your friends and family will be asking for the recipe!
Ingredients of Pumpkin Squares
When it comes to whipping up a delicious dessert, this Pumpkin Squares recipe is a total winner. Not only does it showcase the warm flavors of fall, but it also combines creamy pumpkin goodness with a crunchy graham cracker crust. It’s like a cozy hug in dessert form.
Before you plunge into making these delightful squares, let’s take a look at the ingredients you’ll need. Trust me, having everything laid out will make the process smoother and a lot more fun.
Here’s what you’ll need to gather:
- 2 (8 ounce) packages cream cheese
- 1 7/8 cups sugar
- 1 (15 ounce) can pumpkin
- 2 teaspoons cinnamon
- 1/2 cup milk
- 5 eggs (3 whole, 3 separated)
- 1/2 teaspoon salt
- 1 1/3 cups graham cracker crumbs
- 1/2 cup butter (1 stick)
- 1 (8 ounce) package Cool Whip
- 1 package Knott’s gelatin
Now, before you start tossing everything together, let’s talk about a few things. First off, when it comes to the cream cheese, make sure it’s softened. Trust me, trying to blend cold cream cheese is like trying to mix a rock into your batter—frustrating and not pretty.
And while you’re at it, if you want to spice things up a bit, feel free to experiment with the cinnamon. A pinch of nutmeg or ginger can really take the flavor to the next level.
Finally, if you’ve got a nut allergy in the family, you can totally skip the chopped nuts on top. This recipe is versatile, and it’s all about making it work for you and your loved ones.
Now that we’ve our ingredients ready, let’s move on to the fun part—making those Pumpkin Squares.
How to Make Pumpkin Squares
Alright, let’s plunge into the delightful process of making those Pumpkin Squares from our recipe. First things first, you’ll want to get your oven preheated to a cozy 350°F. It’s like giving your kitchen a warm hug before you start baking.
While that’s warming up, grab 1/2 cup of butter (that’s one stick, folks) and melt it in a microwave-safe bowl. Honestly, there’s something strangely satisfying about watching butter melt, isn’t there? Once it’s all gooey and ready, mix it with 1 1/3 cups of graham cracker crumbs and 1/3 cup of sugar. This blend is going to create the most fabulous crust—think of it as the crunchy foundation of your dessert masterpiece. Pack this mixture into the bottom of a 9 x 13 pan. It doesn’t have to be perfect, but a nice, even layer works best.
Now, let’s whip up that creamy filling. In another bowl, combine the 2 (8 ounce) packages of softened cream cheese, 3/4 cup of sugar, and 2 eggs. Blend everything until it’s gloriously creamy and smooth—like a dream, really. Spread this luscious mixture over the graham cracker crust you’ve just made. Pop that into your preheated oven for about 20 minutes.
While that’s baking, we can get to the pumpkin goodness. In a saucepan, mix together the 1 (15 ounce) can of pumpkin, 1/2 cup of milk, 1/2 cup of sugar, 2 teaspoons of cinnamon, and 1/2 teaspoon of salt. You’ll also want to add 3 egg yolks to this mix. Cook it all on the stovetop for about 5 minutes, stirring occasionally, until everything is well combined and starts to warm up.
Oh, and don’t forget to dissolve 1 package of Knott’s gelatin in 1/4 cup of water and stir it into your pumpkin mixture. This is the secret ingredient that adds a little magic to your squares—how cool is that?
Once you’ve got that pumpkin filling ready and cooled a bit, it’s time to fold in the whipped egg whites. Whip those 3 egg whites until stiff, then blend in 1/4 cup of sugar. Fold this fluffy mixture into your pumpkin concoction gently, so you keep all that airiness intact.
Spread this glorious pumpkin layer over the baked cream cheese layer. Finally, top it off with 1 (8 ounce) package of Cool Whip for that extra creamy finish. If you’re feeling fancy, sprinkle some chopped nuts on top.
And there you have it, folks—your Pumpkin Squares are ready to chill in the fridge until they set. Trust me, the hardest part is waiting to indulge. But oh, the reward will be so worth it. Enjoy!
Pumpkin Squares Substitutions & Variations
While Pumpkin Squares are delicious as is, there are plenty of substitutions and variations you can try to make this dessert your own.
For a gluten-free option, swap the graham cracker crumbs for almond flour or gluten-free cookies. If you want a dairy-free version, use coconut cream instead of cream cheese and almond milk in place of regular milk.
To add some spice, throw in a pinch of nutmeg or ginger. You could even experiment by adding chocolate chips or dried fruit for extra flavor.
The possibilities are endless, so feel free to get creative with your ingredients!
What to Serve with Pumpkin Squares
To enhance your experience with pumpkin squares, consider pairing them with complementary flavors and textures. A dollop of whipped cream elevates each bite, adding a lightness that balances the richness of the squares.
For a warm touch, serve them alongside spiced chai or apple cider; the spices harmonize beautifully with the pumpkin. If you’re feeling adventurous, a scoop of vanilla or cinnamon ice cream can take it to the next level.
Finally, sprinkle some toasted pecans or walnuts on top for a satisfying crunch. These pairings will make your pumpkin squares even more delightful!
Additional Tips & Notes
When preparing pumpkin squares, I always recommend ensuring your ingredients are at room temperature for the best results. This simple step helps everything blend smoothly, creating a creamier texture.
Don’t skip the chilling time after you’ve assembled the squares; letting them cool in the fridge allows the flavors to meld beautifully. If you like a bit of crunch, consider adding chopped nuts or even a sprinkle of nutmeg on top.
Finally, if you’re making these ahead of time, they keep well for a few days in the fridge. Trust me, they’ll be just as delicious! Enjoy your baking!